FREE POSTAGE UNTIL 31st March 2012

Just a quick reminder to those that dont know but I am offering free postage to all orders received on or before the 31st of March 2012. So, take a look at my website and place your order now!
Spent a great day in the studio and even managed a kiln firing. This time I decided to do some really narrow pendants using various types of dichroic glass. Some freshly cut pieces and some that had already been fired into small cabochons. Here you can see the kiln tile set up ready for me to place in the kiln. This can be quite nerve racking as the layers of glass very often slip, slide and even topple over. But with a steady hand and a keen eye the shelf complete with cut glass was placed in the Paragon sc2-w kiln.


About three hours later the pendants that I was happy with had been attached to bails and photographed. These have come quite beautiful, with all the colours of a rainbow.


All approximately 2" x 1/4".


Here they are again but this time I have became quite apt at stitching photos together using the simple paint package supplied with windows. If anyone needs a hand to stitch photo's together then drop me a line and if enough requests are received then I feel another blog post coming on to try and explain.


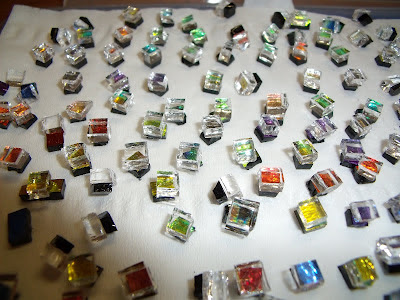
If you would like to buy any of the things that I list then please contact me for more information. All of my work is priced at affordable levels e.g. stud earrings £5 set on 925 silver, Pendants £10, Drop earrings £10 set on 925 silver, Rainbow Tie Clips £10, Bracelets £15, solid silver cuff links £35 and solid silver bracelets £45. All solid silver is stamped 925 silver and if you are unsure of what that means then its 92.5% silver. Classed as solid silver.


Make your own glass cutting board plus hands free filn wash drier.

Just thought I would share my version of a straight cut glass cutter. I made this from bits n bobs that I found around and the only items I spent money on was a nice white grippy knob, four rubber feet and the cutting head, total cost of about £6.

To start with I got a sturdy chunk of very flat wood, this has to be totally flat for obvious reasons. Then I acquired a short length of steel bar, a "T" union from some pipe job that was done years ago, a old brass ruler, some screws, a couple of nuts and bolts and a bit of Patience.

My apologies for the poor quality of the pictures (man verses technology moment)
but I am sure you get the gist of how it works. This was put together in a day making sure the ruler was the last thing to attach. Make sure that this is totally square with the steel bar and that you have a measurement to both sides of the cutter. This will come invaluable when cutting.

Even though I say so myself, this is the best tool I have or made that cuts a straight line every time. No more, holding a straight edge to cut against. You simply hold the glass against the brass ruler and score by pulling the cutter toward you. Hence why it runs along the steel bar, lift to the edge/start of the score then score. What could be easier..... I do sometimes have some failures but I think that goes with the territory.


Being a man, I am always trying to automate things.

Well my next idea was when I found myself trying to dry the coats of kiln wash on my kiln tile. Whilst helping my partner Sue make a sign for the studio I had to keep turning the dryer off. I found this a bit frustrating as the kiln washes was taking longer that I wanted it to. So, with a couple of small boxes a bit of wood and a spring loaded clip (actually a spare tie clip) the set up was complete.

Except one thing. The tile only dried in one place. A quick head scratch and out came my solar powered turn table for jewellery display. I place the tile on the turn table, thinking I might be too heavy for it but to my surprise it started turning. Excellent.......

With the dryer on full and the tile turning, four coats of kiln wash was dry without me holding it for about 20 minutes.
Here is a picture of my hands free kiln wash drier, unfortunately I did not include the turning table in the picture. Well all inventors have secrets, don't they!!!!!


What a weekend we had!!!!

Totally rearranged then painted the studio of Inspired By Script. The workplace and second home to my other half Sue, her work is just "Beautiful". As she is...... I also managed to make jewellery, blog and list on my web site. I even managed to get the "tank" (11 yr old Renault Scenic to the garage for some serious welding.


Here is one of my latest piece's. A really lovely, 4 cabochon bracelet. This was one of the reasons that I was cutting 1/8" square pieces of glass that I mentioned in a previous blog post.

Click here for more information.


More pictures of my work has been taken so watch this space for new designs, that are totally unique and one of a kind.

Something for the Boys!!!

Mens Jewellery
I thought it was about time that I tried to make something for the boys of the world.

Well, lots of head scratching and deep thought later I came up with with some really nice Dichroic Tie Clips. I decided to call them Rainbow Tie Clips because they have lots of colours and I just liked the idea of giving them a colourful name. Also, the name is suffixed with 1C, 2C, 3C etc, you get the picture. All the Rainbow Tie Clips are 2" x 1/2" (approx) and are set on a white metal clip.

1C,
2C


3C

4C


5C

All of these Rainbow Tie Clips are £10 each FREE P&P. If you would like to see more I will be posting again soon.

Small squares of glass make's beautiful jewellery

As I promised here is a small taster of what happens

when you cut 1/8" pieces of glass, fire them and attach them to a silver plated bracelet.

Sparkling, stunning dichroic glass

made into very small cabochons look absolutely amazing.

This beautiful piece of jewellery

and many others are available at affordable prices.

My price's start from just £5

for a pair of solid silver backed stud earrings

to £45 solid silver bracelets.

With many in between.


If you like what you see of want to see other designs I have done then E-mail me and if I can help I will.


For safety's sake!!!

Just a quick note about safety for my fellow kiln firing crafters.

It was recently brought to my attention that the orange/red heat view from a open kiln can be very dangerous to the eyes, even at distance. Its called infrared light (IR).

So, I started to have a look on various glass supply site for a set. I nearly fell off my chair when I sore the price, £34 for a pair of safety spec's, there having a laugh.....After another bit of research I found out they are safety glasses that are called flash safety glasses and I found a pair for £8 from Midland-Moto on ebay. A great service and they came with 48 hours and well packaged.

Here are the said glass and then some very strange photo's of me wearing the stylish accessory that all glass crafter should wear.


OOOPS!!!! sorry for putting you though any trauma from looking at these picture but I am always up for a laugh.

What happened next!!!!

Well, here I am again. Its the wee hours of the morning and I have had a full day of kiln firing and setting the cabochons onto findings.

I managed to transport the very small pieces of glass to the studio without many falling over and apart. As you can see by the following pictures.


Then the task was to transfer them to the kiln tile. Not forgetting to add the 4 to 6 layers of kiln wash as I wouldn't want to damage my new tile as they are about 27 quid each. With this done, the tiny bits of glass was neatly placed on the tile ready for firing. As you can see, nicely lined up rows of glass awaiting the transformation to something beautiful. Dichroic cabochons, to attach to solid silver and silver plated findings.


With all that effort and enjoyment of two nights work and a full days work in the studio. The tile was placed in the kiln (extremely carefully) and the door closed. I pressed a few buttons on the program front and my wonderful new Paragon kiln started up and set going on a path to 800 degree centigrade.

Two hours later and the kiln had finished its alchemy and the tile with cabochons was sat on the desk cooling down its final few degrees.

The finished cabochons looked amazing, even though I say so myself. The beautiful Dichroic glass, even such small pieces had changed from skin cutting chunks of silicon to these beautifully round cabochons measuring about 1/8" in diameter. Just what I wanted. I think my partner Sue Simpson of Inspired by Script is getting a bit bored with me shouting "ow my god look how gorgeous these are" oooops sorry Sue. xxx

Here are the extremely small cabochons after the firing process and cooling down.


And this final picture shows a close up image of one of the smallest cabochons I think I have done so far.


I plan for my next post to be about setting the cabochons onto findings, rings and bracelets. Watch this space.

Cutting glass

For my next batch of glass firing I decided to fire some very small pieces. To be precise, 1/8" square glass approximately. These are quite simple designs and have two layers of glass but the time was taken up with cutting. Yes, cutting by hand 284 squares of glass is quite laborious but I am always up for a challenge. Two nights later, they were cut.......and I still have all my fingers and thumbs although my sanity did ebb a bit on a few occasions. Here are a few pictures to give you an idea of what I was doing.


Well as you can see, very small squares of glass. What I didn't think of before cutting them at night at home is transporting them to the studio whilst they are still stacked. I then realised that many months ago I had bought some fusing glass glue. After raking through the grey matter that lies between my ears I remembered where I had put it for safety. Excellent, I then proceeded to glue each pair of square glass together and 2 hours later left them overnight to set/dry.
The next day I lifted one of the pairs up expecting them to stay firm. Well that was a bit optimistic. They separated at the slightest hint of gravity.
So now I have a selection of apparently glue pairs of glass that I have to transport very carefully to the studio. That should be fun. NOT. But I am looking for to starting up my new kiln again.
Hopefully within a couple of days I will have some finished glass pieces that I will photograph and show you what the finished product look like. As, quite often its a surprise to me when all the parts come together to reveal itself as a beautiful piece of jewellery.

My new paragon kiln :o)

Yeayyy!!!!

I have just picked up my new kiln. Its a Paragon SC2-W, that's with a window so I can see how the firing is going without opening the door.

It also came complete with a shelf and four little feet.

I am so looking forward to doing the first firing.

It has a vent hole at the top, just in case I need to vent any built up fumes.


I mentioned earlier about the window, well here it is. In all its clarity glory....


Yet another picture of the front of the Paragon.


Here is the programmable gadgety thingy on the front. I might need a degree to understand how to use these controls. LOL.


Here you can see the shelf kit and the programmable facia.


My kiln....... I am so chuffed, I can retire my 40 year old kiln which has done me really well but this is slightly bigger and hopefully less temperamental.


Hopefully get the first firing done this weekend, ooow what to do first, earrings, pendant, cuff links or bracelets. The choice of colours are endless and the design have been buzzing around my head for ages.

LinkWithin

Related Posts Plugin for WordPress, Blogger...